Unity_and_VS_Part_One
I recently purchased an Acer Predator with the sole purpose of gaming Gaming and Game Development on my mind. In 2021 I would like to release at least one Xbox game and thought keeping documentation around the process would assist me in sticking with the goal and chronicle the many mistakes I make. Ok, It’s a pickle!
Step 1: Decide on Tools
For me ideas are a little harder than writing code so while there is a ton of design and thought I want to put into my game the easiest first step is to select an engine and drive that puppy into a crappy “Hello World” example wall. My introduction to programming was BlitzBasic and over the years I’ve written games with SpriteKit and Phaser but I think that each project one works on should be approached with the knowledge gained and maybe tools. That being said there are only so many options here so my experience with Visual Studio and C#, although drastically different than writing a game, did influence my decision.
However, before influencing can begin one must start and fortunately micro$oft provides a fair amount of guidance through their E2E Game Dev Guide. Without a doubt this is the most important link on the page simply because of the sheer amount of information available to review and all the subsequent links within. There’s a ton of information about setting up a developer account in Partner Center, connecting with other gamedevs via Forums and the steps to take to along the way in Game Planning but I eventually came to the ‘x’ on my map.
It turns out there are a few different ways to create Xbox games, but the path that requires the least amount of c++ of least resistance through the whole process seems to be the creation of a Universal Windows Platform app which can be uploaded to the micro$oft Store. There’s an entire thread devoted to doing this with options other than Unity but some of them no longer exist. Going through the documentation it seems alternatives are MonoGame, Cocos2D, Unreal, and Construct. I’ve worked with Cocos on iOS in the past and for some reason it never really clicked for me so it is immediately removed from the list, and as much as I have come to not disdain working with Javascript on a few other projects after a review of Construct it seems a little too WYSIWYG. On the other hand Unreal seems a little too complex and given the current litigation between Epic and Apple who knows where that would stand if I ever intended to bring something to iOS. So that leaves MonoGame and Unity.
MonoGame is probably closer to what I would expect an engine to be- actually it is exactly what I expect one to be given XNA is what we built Xbox 360 games with in college, but after running through samples for a few days I’ve come to the conclusion that work with it would require a little more maintenance than I might want to take on. A great example of this can be found reviewing how Well it plays with UWP. For me any dependency that introduces a potential manual change is a bad one and though I’m sure there will be similar issues with Unity I did not encounter any showstoppers across a similar amount of time running the same set of sample actions (create a boilerplate game, attach SCM, attempt to deploy, etc.). So, Unity it is!

Queue the Blink 182 …
Step 2: Acquire Tooling
As of this writing the most accessible option to setup Unity is by downloading Unity Hub. The Hub, provides a UI wrapper around various versions of Unity, which is both the app name and the SDK/engine name shrugs. After using it for a bit I can say it does a great job serving as a one stop shop for all elements related to Unity and offers a fairly simple UI to navigate tutorials, starter projects Microgames and different Unity Versions. One glaring problem is that Assets are not really accesible through this window so when I dove a little deeper into using third party assets it always required a sample project be created and assets viewed through the proper Unity Editor. Being able to sample assets or run an example through Unity Hub is my top feature request atm but my number two feature request, a Lego Micrograme, was fixed in 2.4.1. After Hub is installed continue on to install the Unity SDK. I’m not going to go into tremendous detail here because Unity already does that for us.
After getting Unity installed I moved on to getting Visual Studio 2019 setup. With the understanding that I wanted to handle any scripting required for my game in C# this seemed like a logical next step. For anyone familiar with the developer experience of VS and micro$oft describing this as buttery smooth comes as no surprise, but to anyone that hasn’t had the pleasure of working within the full suite of tools that micro$oft provides to developers I would encourage one to do it. I discourage pigeonholing a project into .Net, C# or shudder VB.net just to use Visual Studio, but the rise of VSCode shows that micro$oft really knows their way around developer tools. snarks, departing soapbox Ok, installing here is simple and once I had those setup it was time to finally select the crappy “Hello World” wall for which to crash.
Step 3: Microgrames and Remote Deploy
Within Unity the standard boiler plate projects are called microgames. Upon attempting to create a new project available options are presented. With little direction where or what my game will ultimately be I decided to go down the First Person Shooter path and created an FPS Microgame with a groundbreaking title. (In retrospect a platformer would have been the better choice given the obvious Universal Windows Platform(er) pun, but sometimes I suck so 🤷)
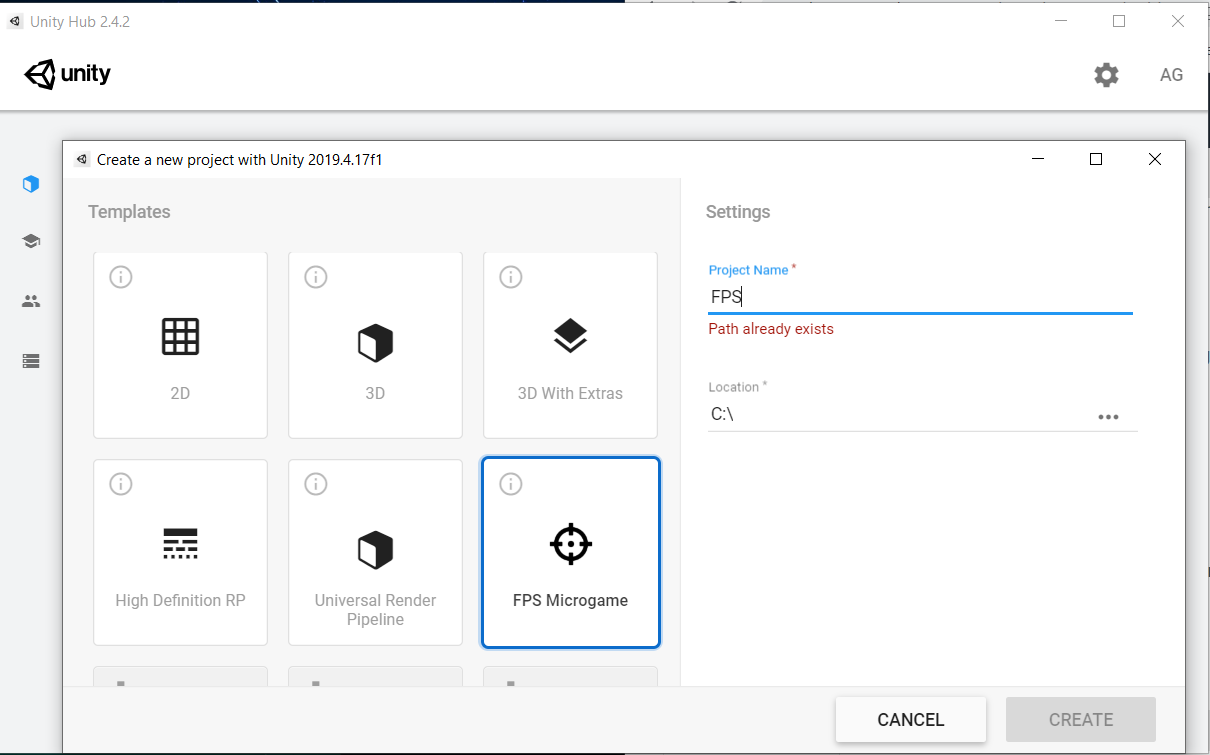
Creating a new project
I highly recommend storing your code somewhere other than the root, but for screenshot simplicty that’s where I saved it. In the future I will dive into various options I’m using within Unity itself, like the Asset Store which expands the universe of potential for Unity exponentially by delivering starter kits for menus, enhanced shaders, physics, lighting and entire game systems BUT since as you can see it gets a little overwhelming I’ve decided to focus here simply on what it takes to get something deployable to Xbox so a running game was enough.
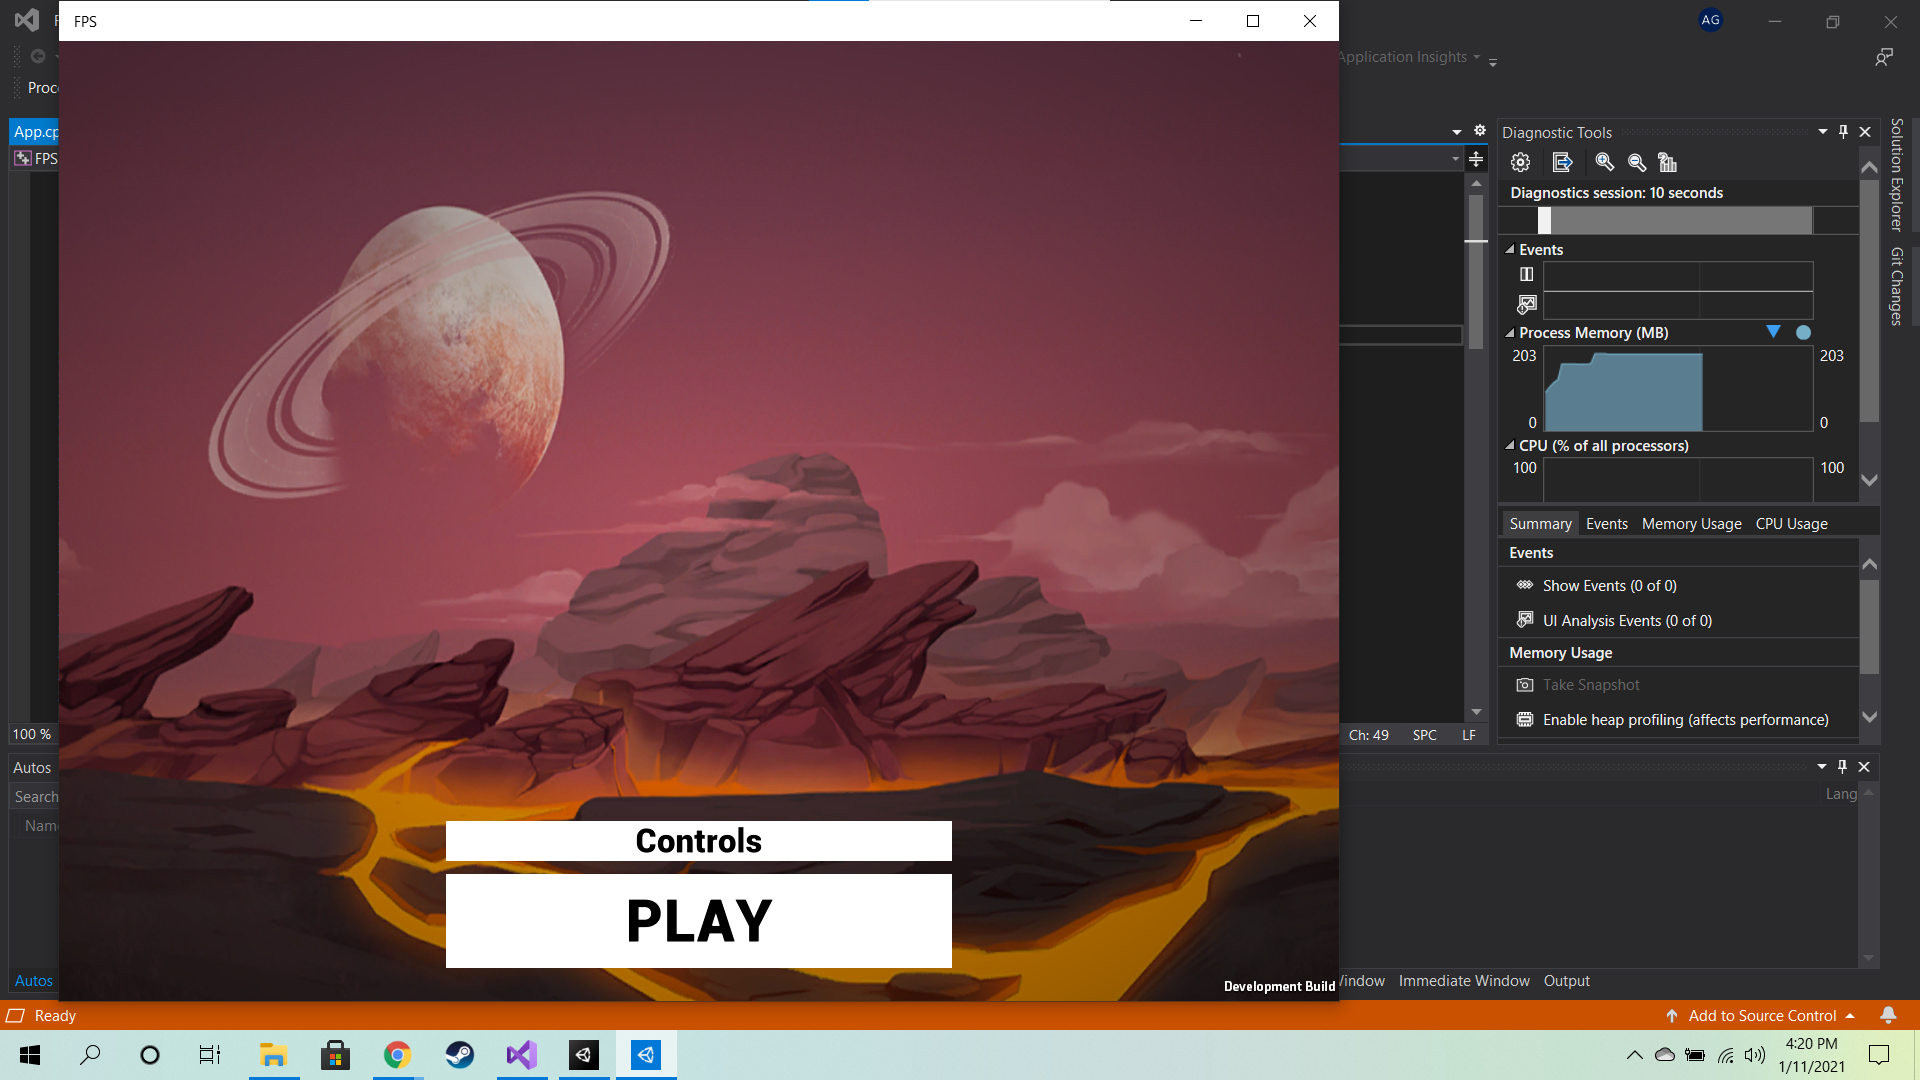
It’s alive…
In simplest terms the typical output for a Unity project I’ll deviate a bit. Normally Unity’s output would be a program that one could provide to quality assurance engineers for testing or upload to a gaming service for beta and all the gold master related steps for a release, but in our case we have an intermediary step in which it will create a project that Visual Studio can manipulate. Building this intermediate VS sln gives us the option to create a UWP binary that is deployable to local and remote machines. Xbox Store failure here we come! In order to achive this focus shifts to micro$oft and the veritable powerhouse Visual Studio 2019. Tactically we need to navigate to the generated .sln file and open it with Visual Studio. My expecations here were really high, and outside of Cable Guy level of usefullness with documentation regarding the narrow 2 - 60 GBs of space requirements for the most part setup and connection to Unity was a seamless process. From within Visual Studio there are options to install Plugins, and from experience I will say download all of the game related plugins and additionally anything that could be remotely considered game related.
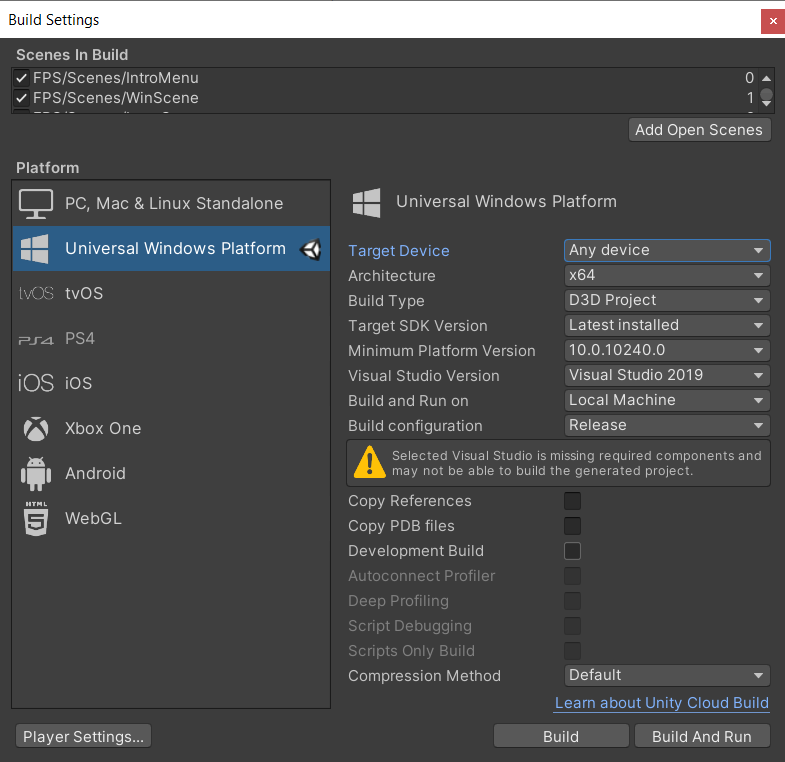
Creation of the intermediary .sln for Visual Studio
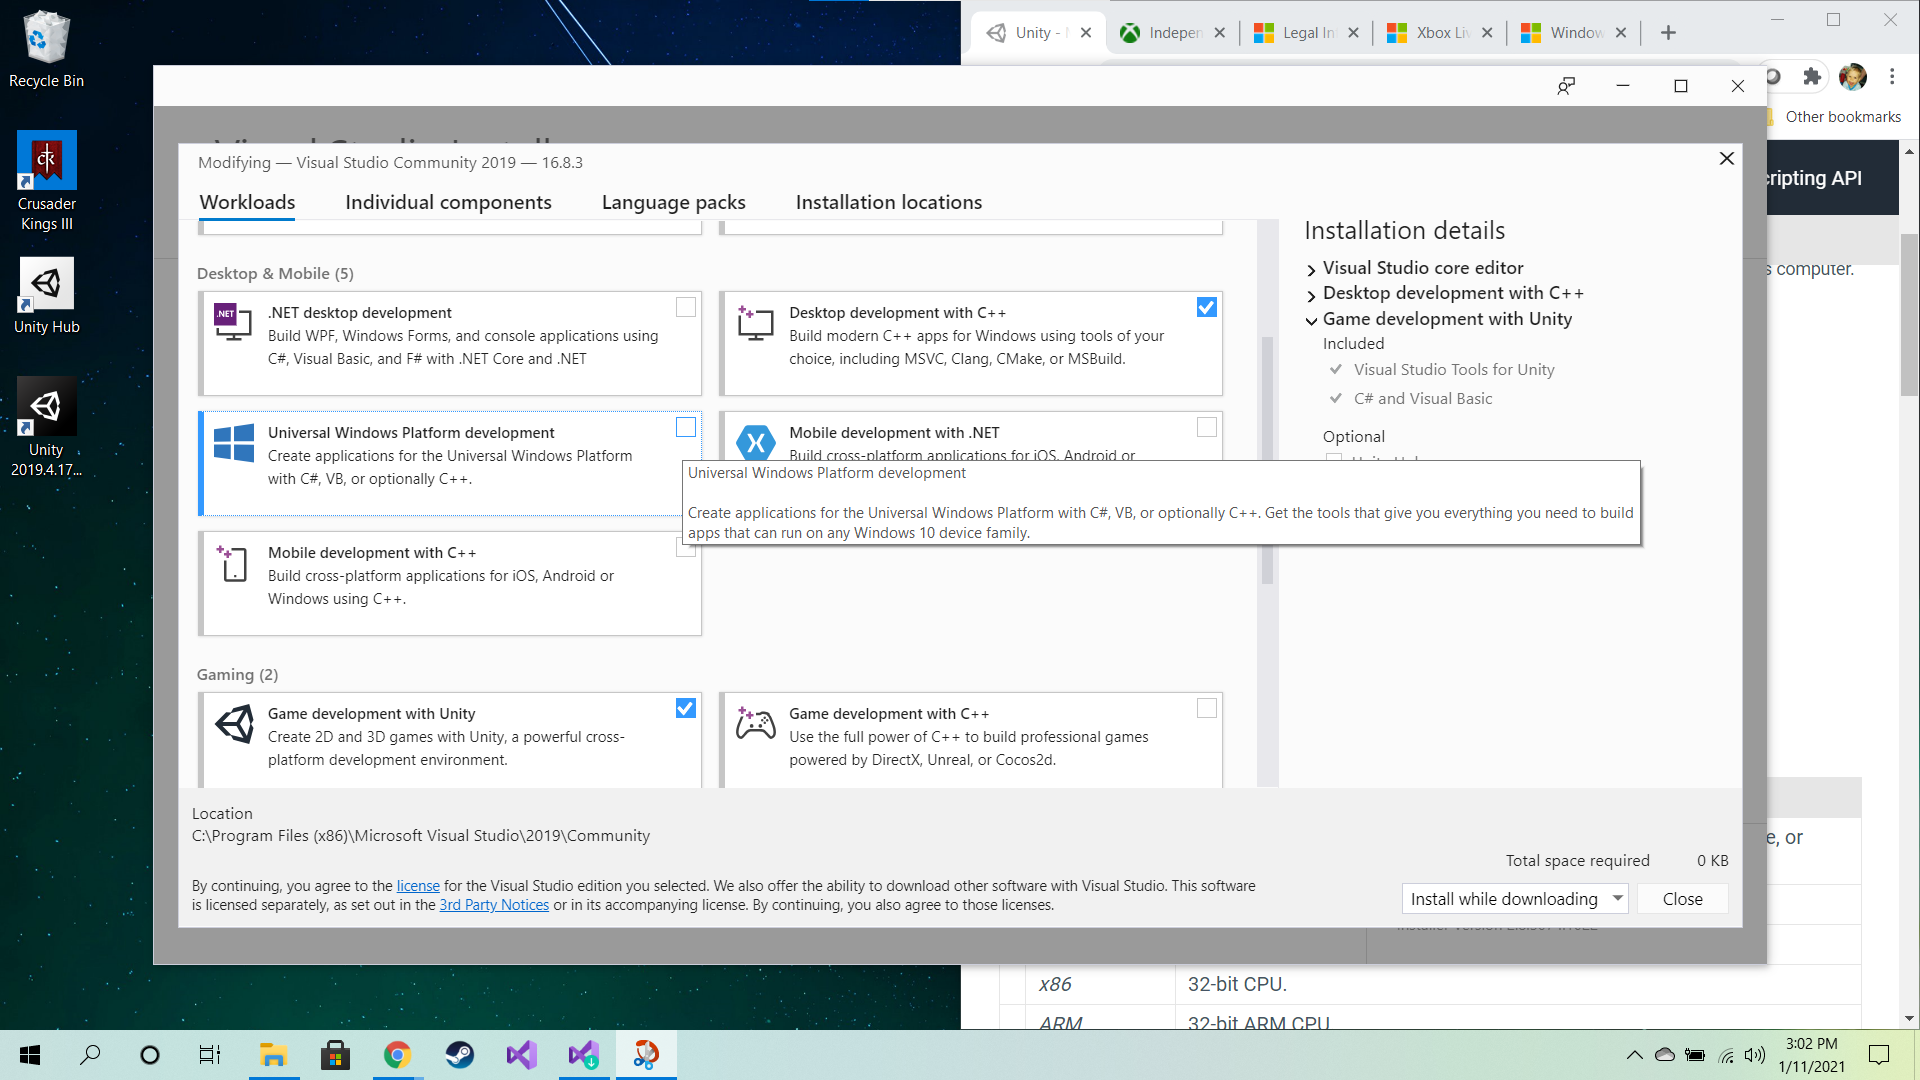
Crap what a bad screenshot. Ok, be sure to select the Universal Windows Platform, Game Development with Unity and Game Development with C++ Options. I feel the Unity one should give one everything, but …
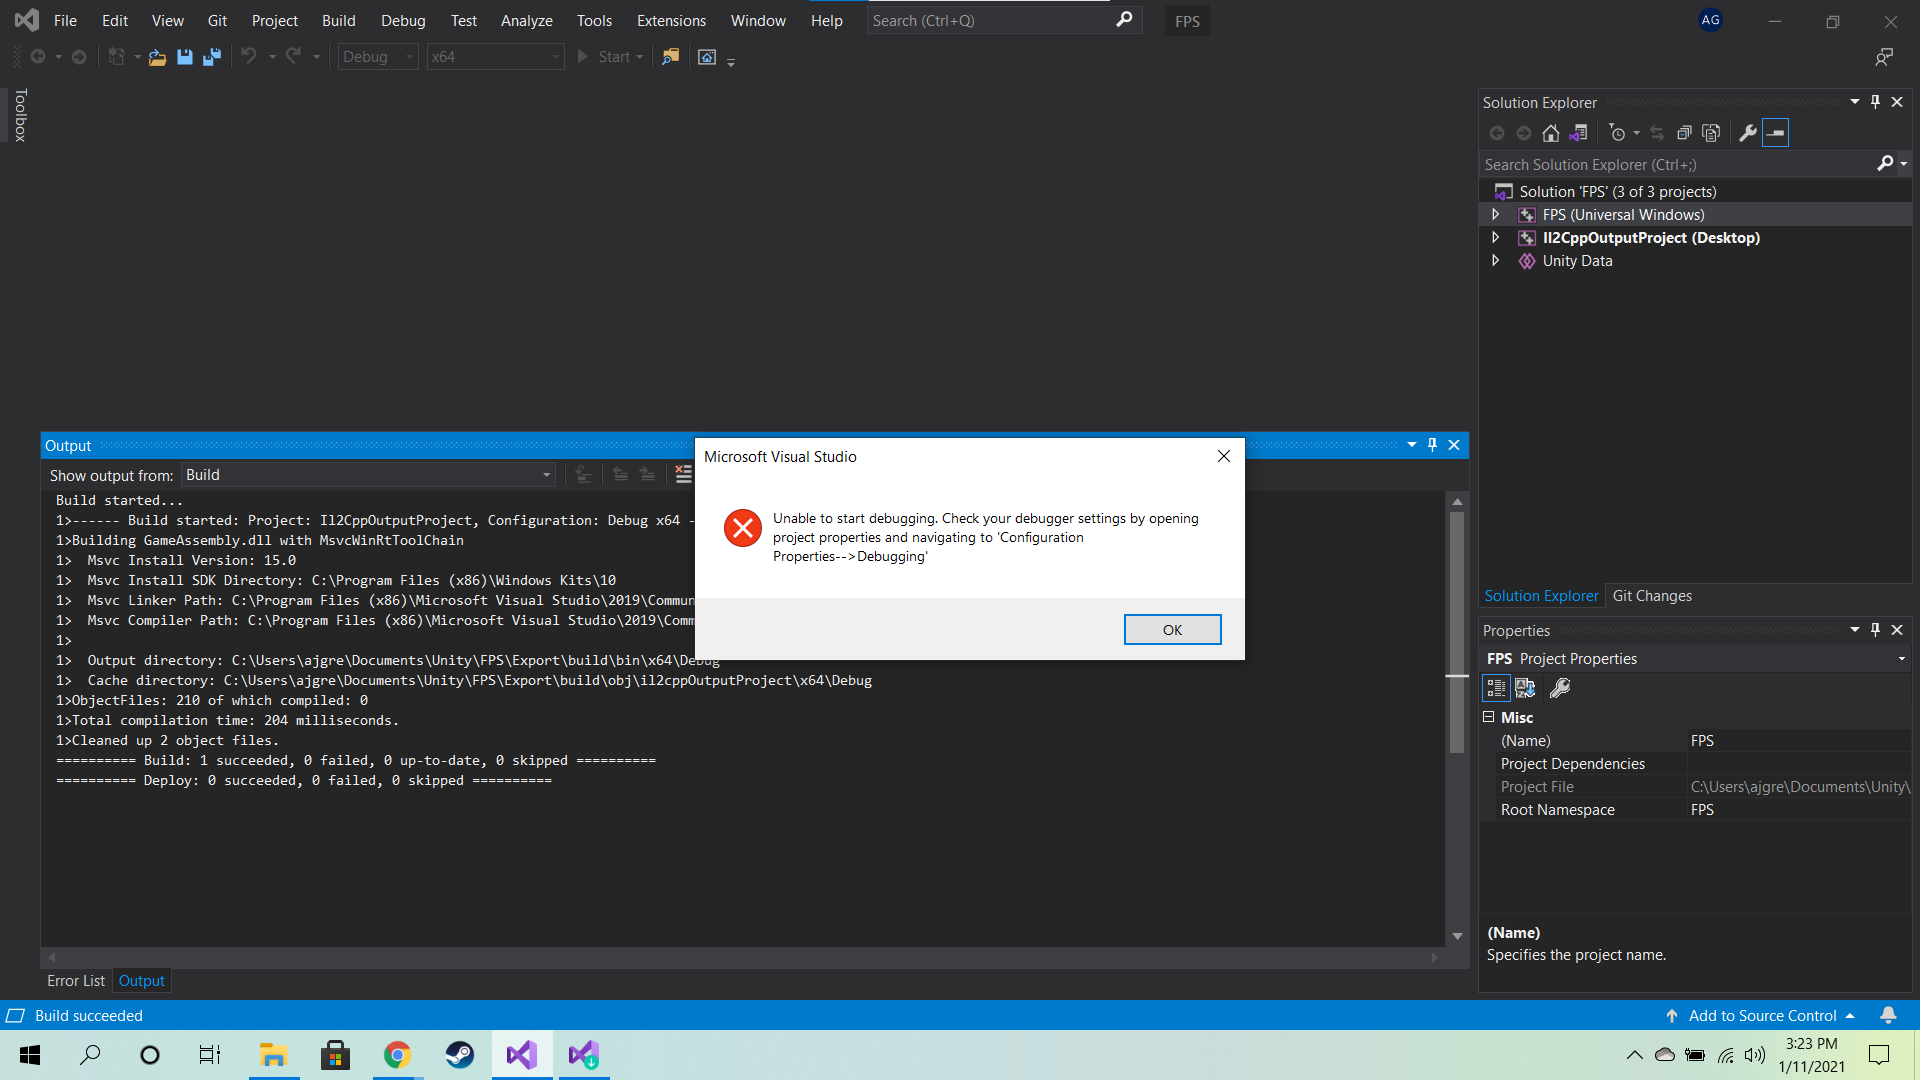
without all three there are persistent Build issues.
After much fiddling and faddling I was able to successsuflly Build the Fortnite killer FPS Microgame. I had to enable Developer Mode and I could never get just the Game Development with Unity option to work so I always included all three of the items from my screen shot above but with the .sln building and running locally I had a theoretically deployable UWP game. crowd goes wild. takes victory lap way too early There is plenty more on this topic but I feel like this is enough detail for one post. In the next portion of this I’ll setup Visual Studio for the remote connection to an Xbox, and talk through deploy steps across the local network.